
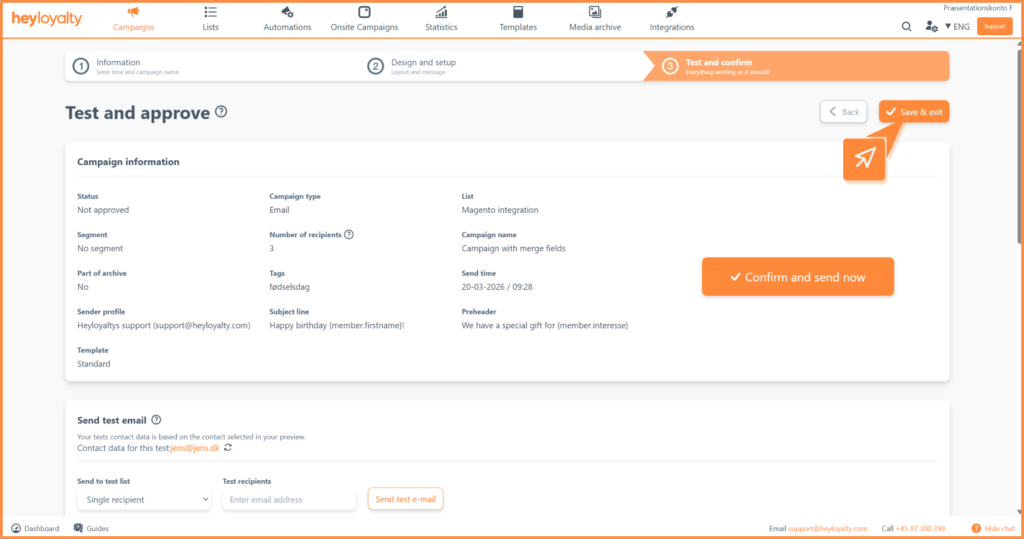
In Step 3, you ensure that your campaign is ready to send. Here you test the content and design, review how the campaign looks to the recipient and approve it for sending. This guide takes you through all the options in Step 3 – from testing to final approval.
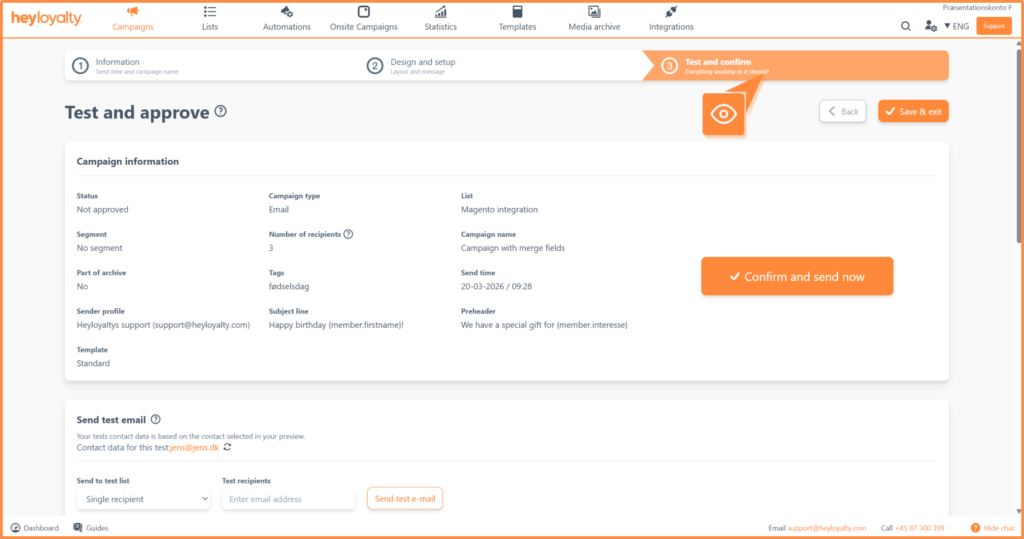
Step 1: Send a test email or text message
We recommend that you always test both the content and design of your campaign before sending it out.
You test the campaign by sending a test to yourself or others who can approve the content.
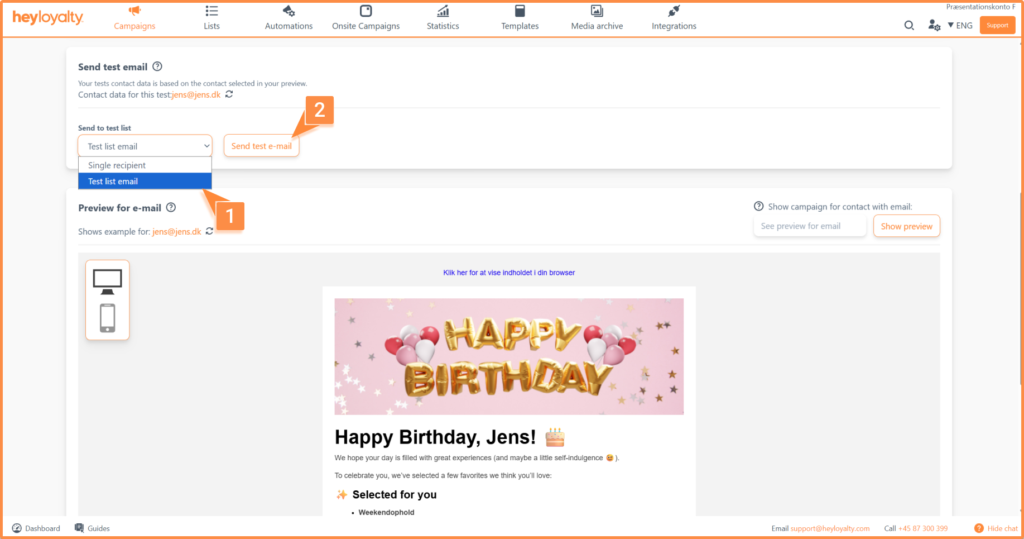
To send a test email, enter the email address in the field below:
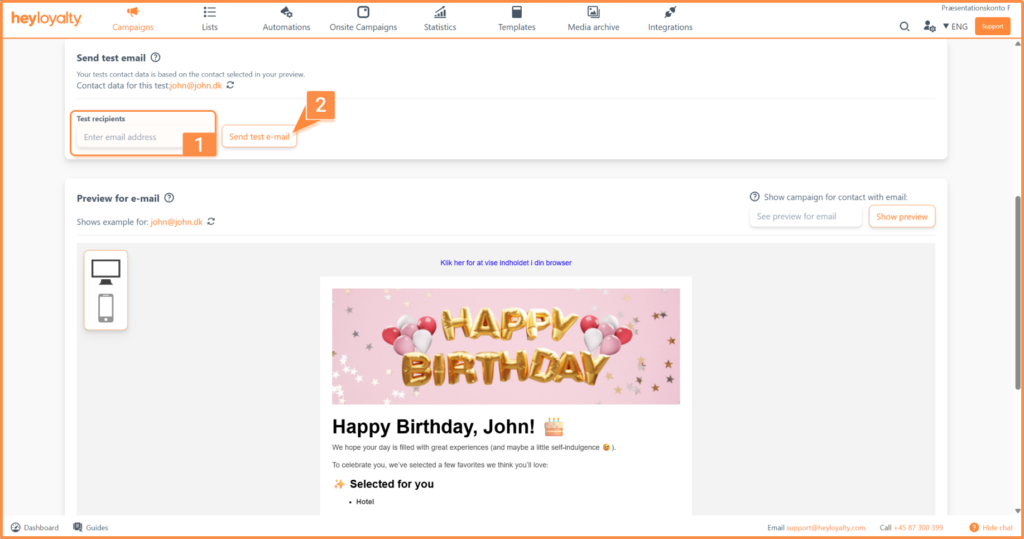
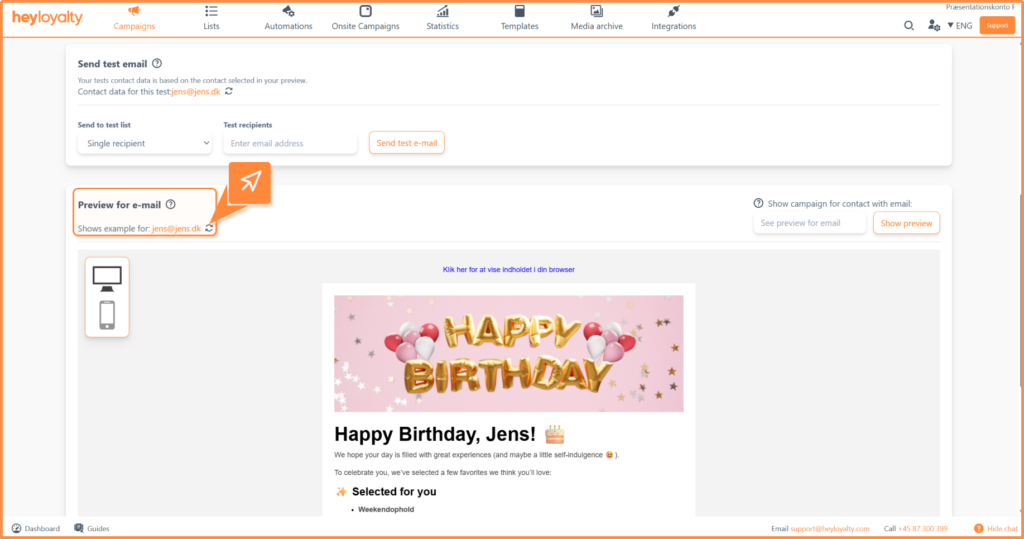
To test with another contact, click the icon next to the email address.
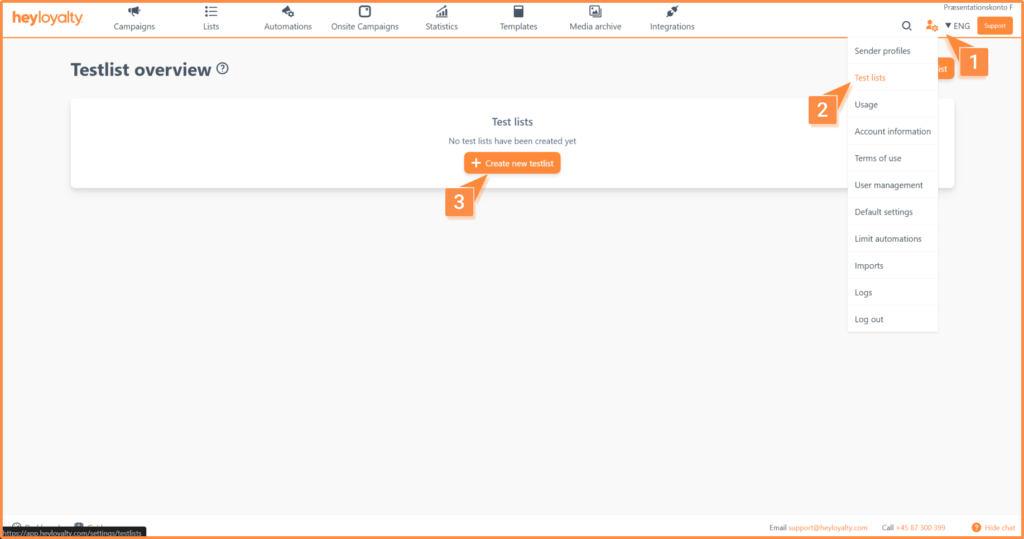
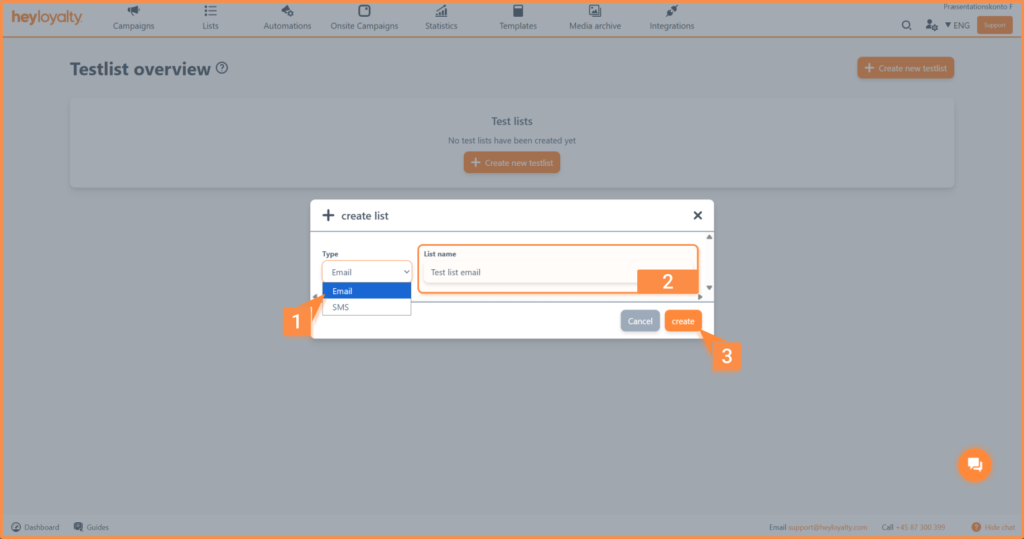
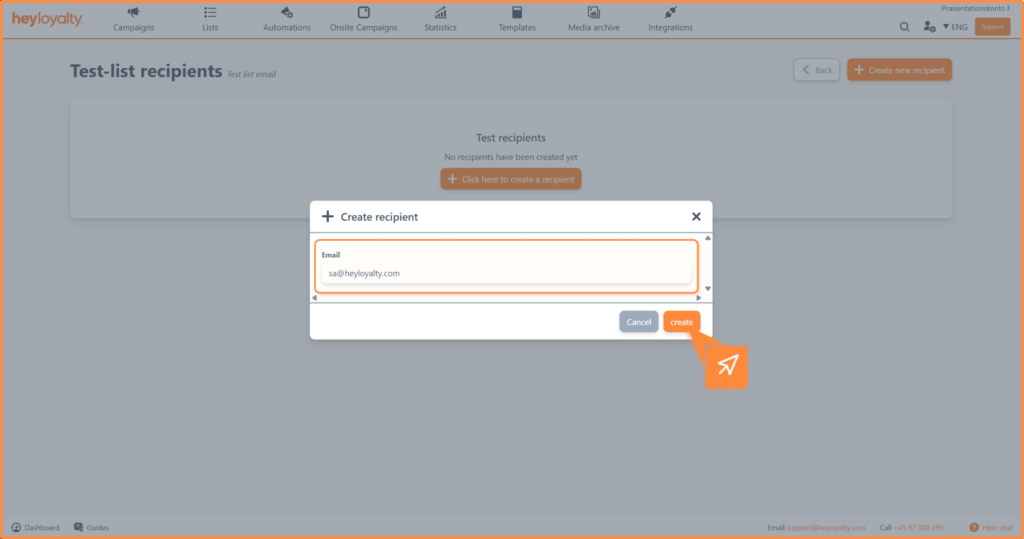
If you have regular test recipients, you can create a test list so you can quickly test future campaigns. Create the test list under account by selecting test lists.
To send to the test list, select the test list name in Step 3:
Step 2: Show member data as email
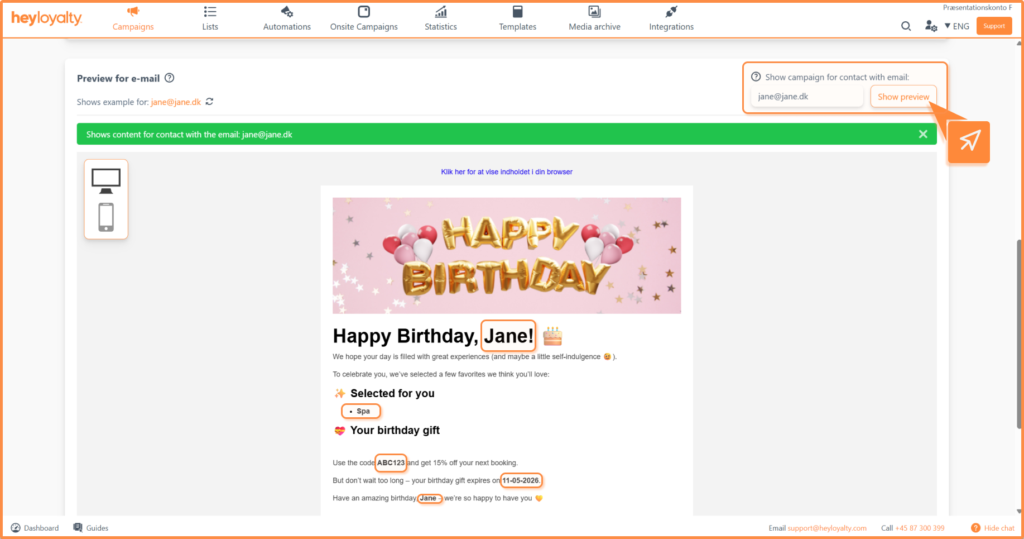
With the Show member data as email feature, you can preview the email as it will look for a specific member.
Enter the email address of the member you want to preview – for example, brianeriksen@gmail.com for member Brian Eriksen. The member’s data is used in:
- Merge fields – so you see how personal information is merged in
- Rules on rows – so you see which elements the member actually sees
Step 4: Check how your campaign looks
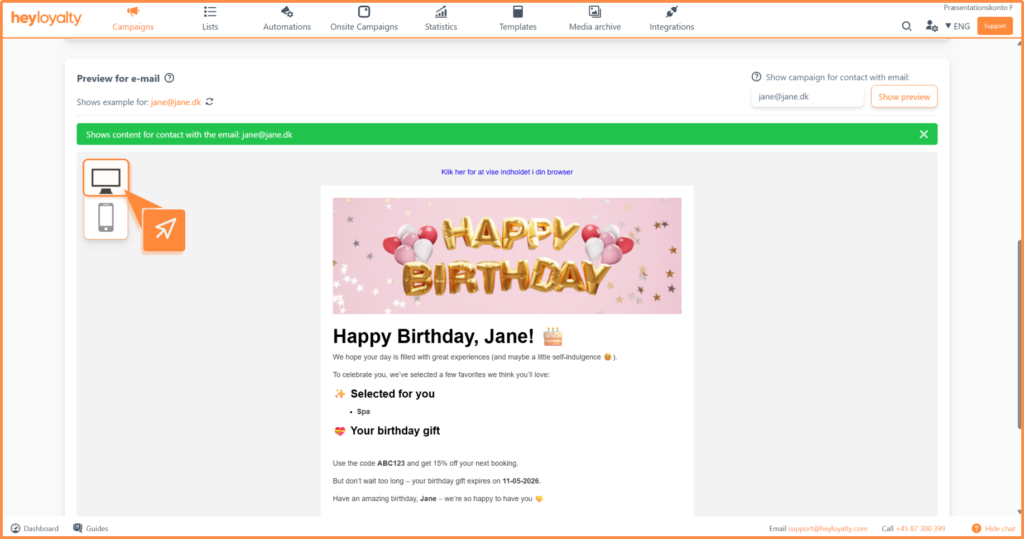
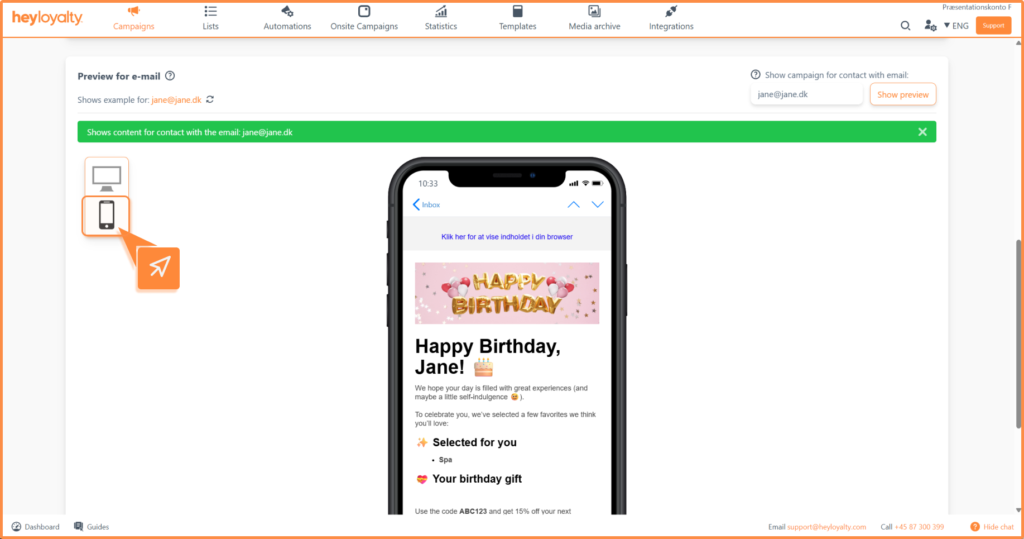
At the bottom of the page, you can see how your campaign looks on desktop and mobile. Use this view to make sure the design and layout work on both devices.
Computer:
Mobile:
Step 5: Approve, or approve and send now
Once you’re happy with the campaign, you’re ready to approve it.
- Approve – Used if the campaign is set to be sent out at a later date.
- Approve and send now – Used if the campaign needs to be sent out immediately.
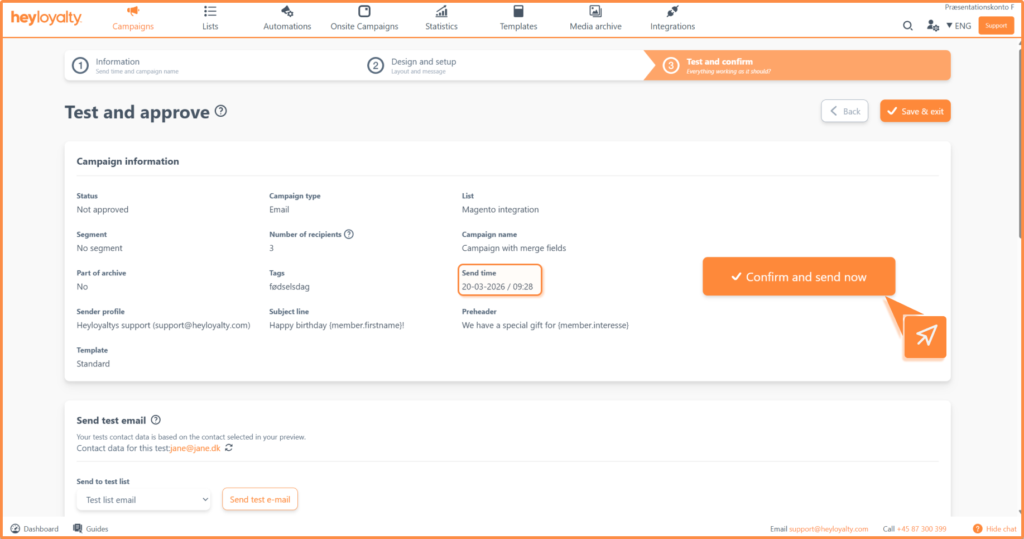
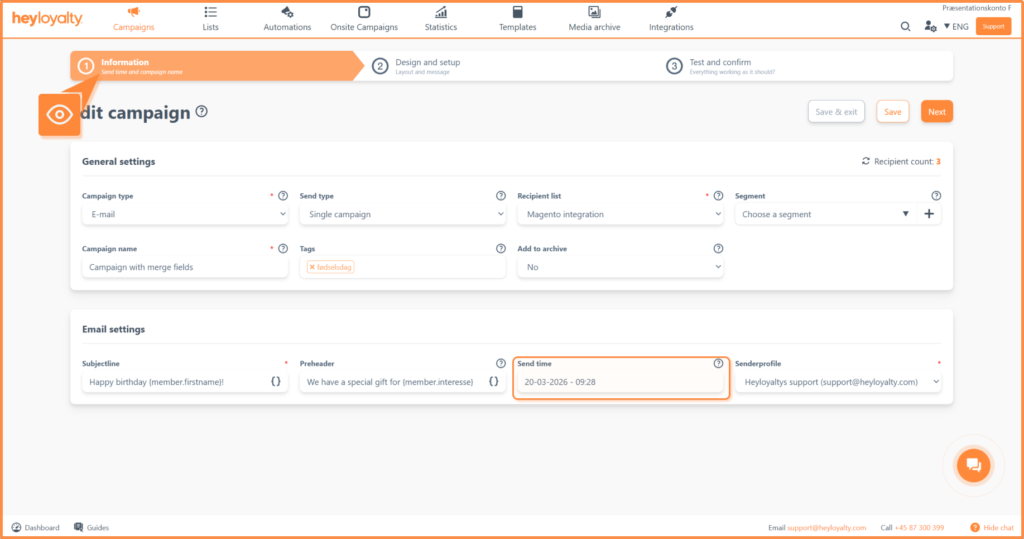
To change the send time, go back to Step 1: Information and adjust the Broadcast time field.
Step 6: Save and exit
Can’t finish the campaign or don’t know when to send it out yet? You can always click Save and finish. This feature is available in all three steps, so you can return to the campaign later.
You are ready to send
You have now tested your campaign, checked its appearance on both desktop and mobile, and approved it for sending. With the different testing options – from simple test emails to extended testing across email clients – you can ensure your recipients have a flawless experience.
For more advice on setting up and sending campaigns, you are always welcome to contact us.