Integration with Meta: What is it and what does it require?
IMPORTANT: This setup must be done by an employee who has access to both your company’s Facebook page and ad account.
The employee must have access to the following on the Facebook page as a minimum: Content, messages, ads and insights and Leads.
The employee must have access to at least the following in their ad account: Manage Campaigns (Ads), View Performance and Manage Creative Hub Mockups.
With an integration between Heyloyalty and Meta, you can create ads on Meta’s platforms. You can send your members from Heyloyalty to Meta and add them to or remove them from a customaudience on Meta. This lets you create ads on Meta that only reach people who are subscribed to your newsletter. If you create leadads (whose goal is to get people to sign up for your newsletter), you can likewise exclude the members who are already on your list in Heyloyalty – so you avoid spending ad money showing your ad to people who are already subscribed to your newsletter.
By sending your members from Heyloyalty to a custom audience on Meta, you can also create loyalty-building ads, because you can be sure that the people who see the ad are already subscribed to your newsletter.
Setting up the integration with Meta
IMPORTANT: This setup must be done by an employee who has access to both your company’s Facebook page and ad account.
The employee must have access to the following on the Facebook page as a minimum: Content, messages, ads and insights and Leads.
The employee must have access to at least the following in their ad account: Manage Campaigns (Ads), View Performance and Manage Creative Hub Mockups.
When you are sure that the above is in place, this employee can log in to Heyloyalty and set up the integration as follows:
Set up Meta – leads ads and audiences in Heyloyalty by clicking Integrations → List integrations → Meta – leads ads and audiences → Set up integration → Activate Meta.
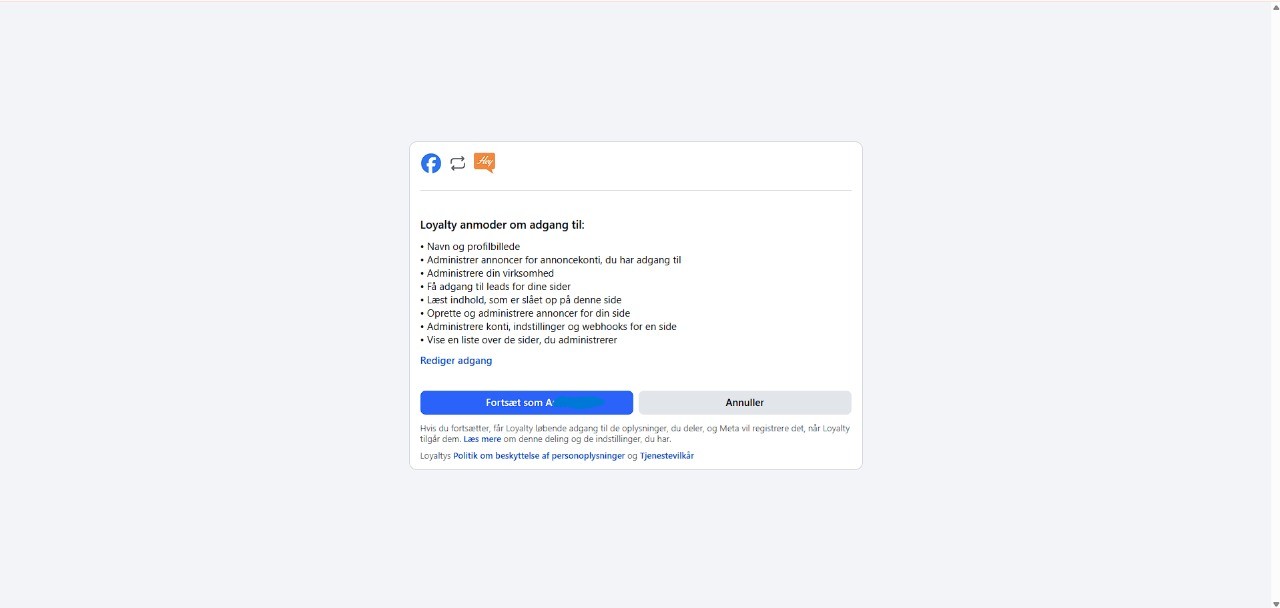
Facebook will now open a new window.
Here, click Edit Access and make sure your Business’s Page is selected. There must be a check mark next to the Facebook page and ad account in question. Then click Continue as *your name*.
After you clicked Continue as *your name* in the previous step, you should have been taken back to Heyloyalty, where you can now click Create Meta integration. Alternatively, you can find your way back by opening Heyloyalty and clicking Integrations → List integrations → Meta – lead ads and audiences → Edit integration → Create Meta.
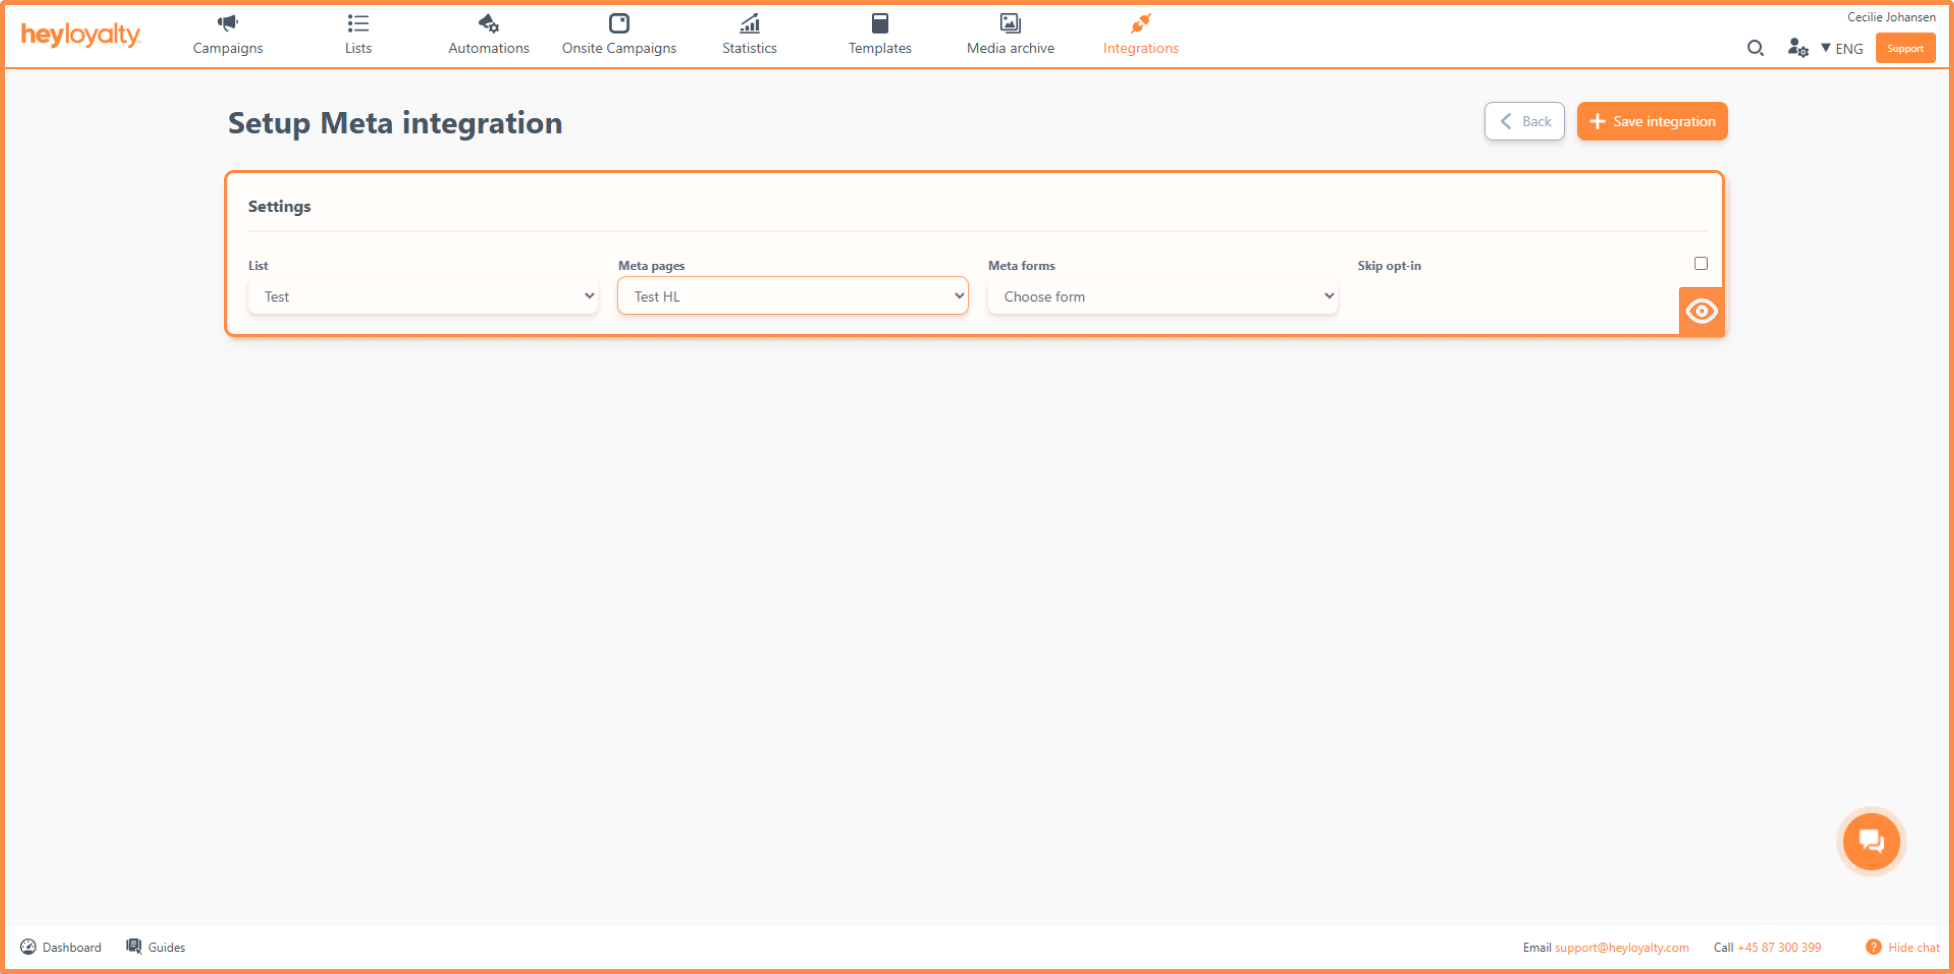
In the List field, select which of your lists in Heyloyalty the integration should be linked to. In Meta Pages, select the Facebook Page (and the associated ad account) you want to use. In the Meta forms field, select the form that you use for your lead ad.
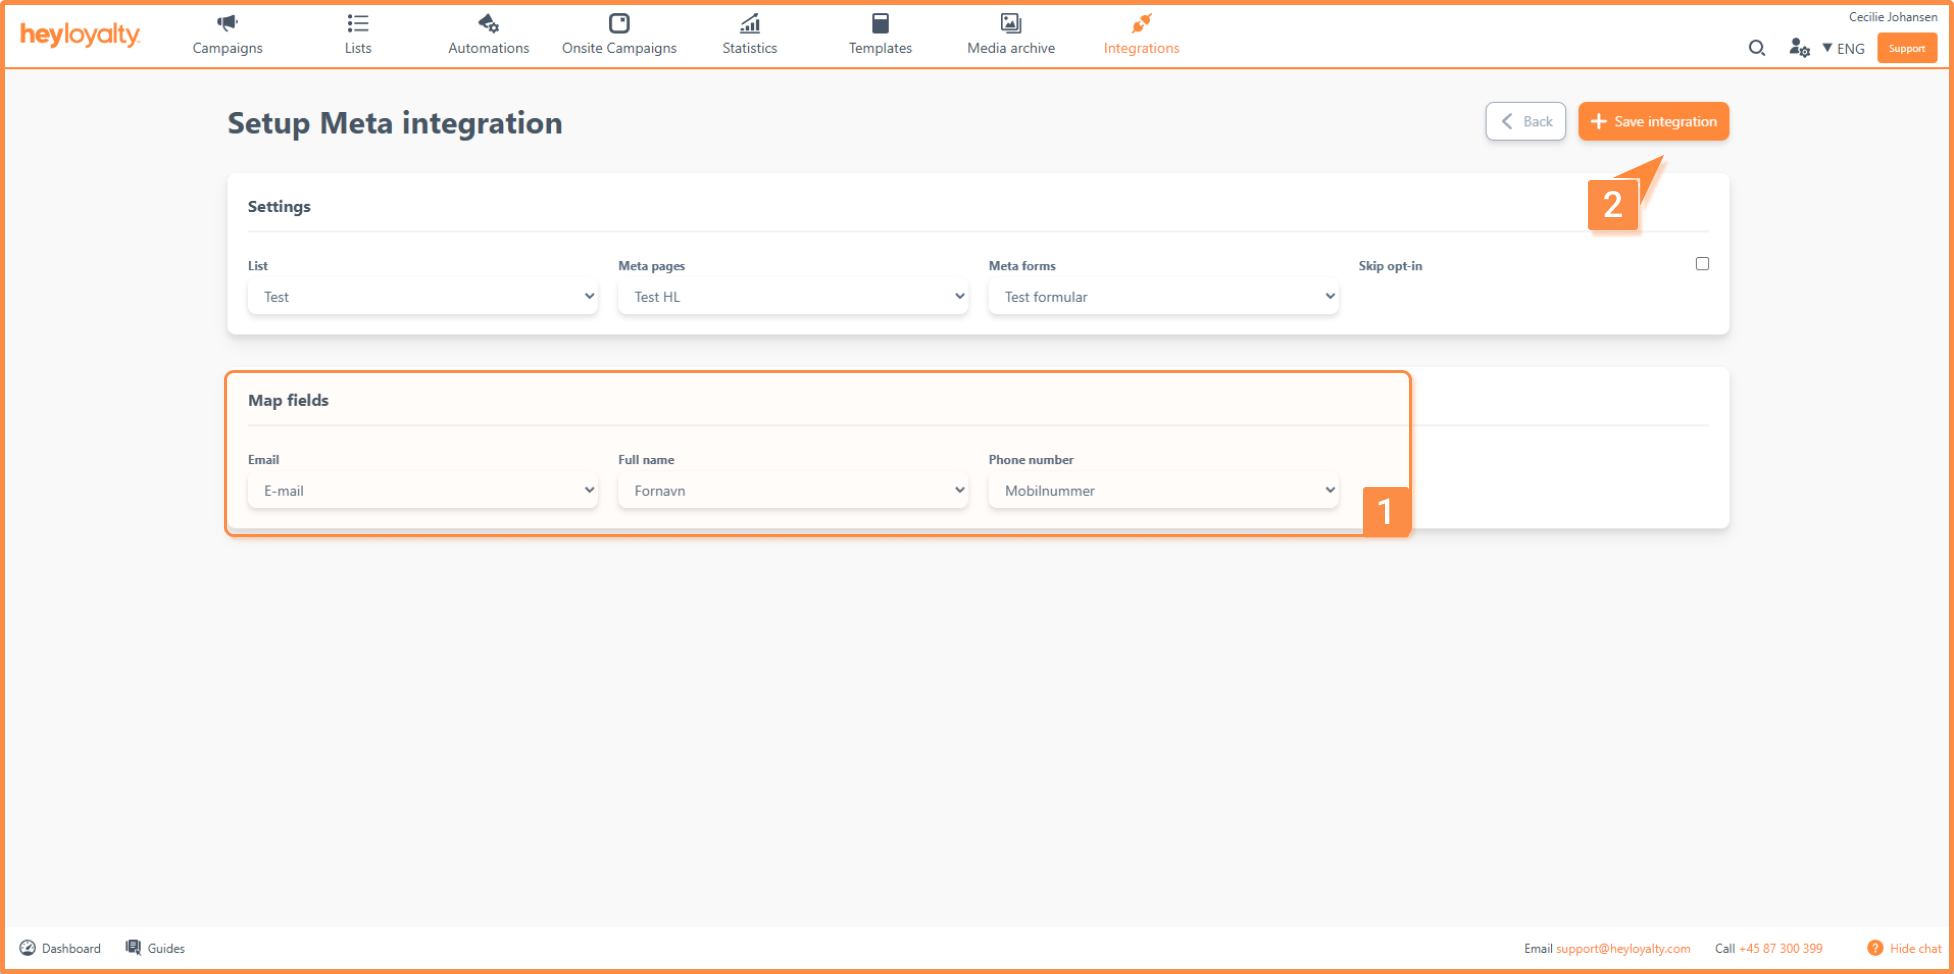
New fields will now appear under Mapping of fields.
The fields you can see here are the fields used in the selected form.
Tip: Use First name and Last name in your forms on Meta so you can keep them separate in Heyloyalty as well. If you use Full name in your form on Meta, the member’s entire name will be entered in the First Name field in Heyloyalty – this can cause problems when you want to use the First Name field in your emails to members.
Repeat this process for each additional form that you actively use in your lead ads on Meta.
Tip: Heyloyalty recommends that you log in to the Business Suite on Facebook, find your active lead ad and send a test lead. This way, you can make sure that sign-ups reach Heyloyalty correctly – or spot a problem that you can correct in the setup in Heyloyalty or in the setup of the form on Meta.
If you need information or help that you cannot find here on the guide site, you are always welcome to contact our support! support@heyloyalty.com
Didn't find the answer?
Write to our support team and we'll help you further.